How to Wet-Form Veg Tan Leather
23rd September 2022
What is Wet-Forming?
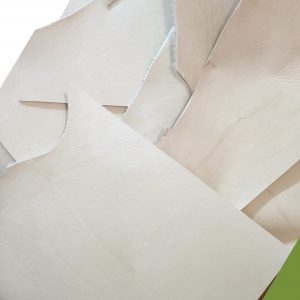
Wet forming vegetable tanned leather is an easy way to achieve amazing shapes!
The process involves taking a wet piece of veg tan leather and placing it onto a moulded piece of foam or other shape. You then place heavy objects on top to hold it in place while it dries, or you can also fasten it to a wooden board using staples or push-pins. Once dry you’ll have a beautiful piece of leather that’s ready for oiling, dying or stitching!

Leather is a beautiful material to work with and vegetable tanned leather is great for beginners, it’s easy and forgiving to work with.
If you’re new to working with leather and are looking for a great material to start with, vegetable tanned leather is a great place to begin. It’s easy to work with and forgiving. Because of this, veg tan leather is also a good choice for beginners who want a more traditional look that will hold up over time.
The wet forming process is used to mould leather into a shape and set the final shape of the piece.
Wet forming is a way to mould leather into a shape. By submerging the leather in water and then clamping it into place, you can set the final shape of your workpiece. The wet forming process is used to create shapes that are difficult to achieve with other methods, as it allows for more flexibility in moulding and shaping vegetable tanned leather.
For wet forming you need vegetable tanned leather, moulded foam, a bucket of water, heavy objects and gloves.
To wet form leather, you’ll need:
- Vegetable tanned leather
- Moulded foam (like an old mouse pad or something similar) or shape for mould
- A tray of cold of water
- Heavy objects (like books or bricks) that can be placed on top of the moulded foam when it’s in the bucket. Or you can use clips, staples or push pins.
You’ll also need a blunt creasing tool to define the edges.
Start by submerging your piece of veg tan leather in water for about 30 seconds to a minute.
- Start by submerging your piece of veg tan leather in water for about 30 seconds to a minute.
- Make sure you use a bucket of water, not the bathtub! Don’t submerge it for too long—if you do, it might start to wrinkle up and become stiff when it dries out. Don’t wring it out either: just let it soak until most of the water has been absorbed into the leather.
- Wear gloves while handling wet leather (unless you want to get fingerprinted). Wet veg-tanned leather is very soft and delicate, so try not to touch the surface with your hands as much as possible during this step
Squeeze out as much water as possible from the leather. Don’t wring it as this will damage the fibres.
Once you’ve rinsed your leather, squeeze out as much of the excess water as possible. Don’t wring it! This will damage the fibres and make your leather brittle. Instead use a towel to dry it off.
Let your wet leather sit on top of your moulded foam or shape until it stops dripping (not more than 5 minutes).
- Let your wet leather sit on top of your moulded foam until it stops dripping (not more than 5 minutes).
- Once it’s dry, use and enjoy!

Place the leather onto your moulded foam and use heavy objects to keep the leather in place while it dries.
Once the leather is dry, it’s time to cut out your pattern. You can either use a template or do freehand cutting. I tend to prefer using a template because it’s easier for me and I don’t have to worry about making mistakes. However, if you’re more comfortable with freehand cutting, go for it!
Once your pieces are cut out, grab some contact cement or leather glue and brush some onto both sides of each piece place the pieces together and press down firmly so they bond together.
Leave them overnight to dry completely before moving on to punching and stitching.


Once dry you’ll have a moulded piece of vegetable tanned leather that’s ready to be oiled, dyed or stitched!
Once your wet formed leather has dried, you can dye, oil or stitch it in any way that you like. The possibilities are endless! You’ve just created a custom piece of leather craft that will last for years to come.

Wet forming vegetable tanned leather is an easy way to achieve amazing shapes!
So, you’ve got a great piece of vegetable tanned leather. You’re ready to start creating some amazing stuff with it, but you aren’t sure how to go about it. If this sounds like you, then wet forming may be your best option!
Wet forming is an easy way to make use of the unique properties of vegetable tanned leather while also getting creative with your pieces or items. There are many ways that wet forming can be used; here are just a few:
- creating interesting shapes and designs on pre-made goods (bags)
- creating moulds for other applications within the design process
We hope that you found this article helpful in learning how to wet form vegetable tanned leather!
Auto Amazon Links: No products found.


